


Thirdweb is a web3 platform that provides developers with tools to build, deploy, launch, and manage their applications and games. Some of these tools include pre-built smart contracts, SDKs, and APIs.
In this tutorial, you will learn how to register a smart contract to Mode Network’s SFS (Sequencer Fee Sharing) Contract while deploying with Thirdweb.
Prerequisites
Before you continue with this tutorial you should:
Create a thirdweb account.
Have a basic understanding of Solidity.
Bridge Sepolia Eth with Mode Network.
What is Sequencer Fee Sharing (SFS)?
Picture this! When you deploy your smart contract to Mode Network, you will be able to receive a percentage of the transaction fees associated with your smart contract. In other words, you get a share of the transaction fees when transactions are made on your contract, rewarding your contribution to the network and incentivizing further innovation and usage of your smart contract.
But, how does this work?
You must register your contract with Mode Network's Registry/SFS contract. When you register, the Registry contract issues you an NFT as a claim to earned fees. The call to register your contract must come from your contract.
Also, an off-chain component is responsible for processing transactions and calculating your share of fees from each transaction. Your minted NFT allows you to claim your fees accumulated in the SFS contract. One thing to keep in mind is that there would be a two-week time for the fees to accumulate before being transferred to the SFS contract. When this is done you can withdraw your rewards..
How does the SFS Register function work?
We mentioned earlier that the call to register to the SFS needs to come directly from the smart contract you want to register. To understand how this all works, let’s look at the register function.
Note that this is only a portion of the SFS contract, check here to see the complete code.
function register(address _recipient) public onlyUnregistered returns (uint256 tokenId) {
   address smartContract = msg.sender;


// Check if the recipient address is valid; revert if it's null
   if (_recipient == address(0)) revert InvalidRecipient();

// Generate a unique tokenId, mint an NFT to the recipient with it, and update         //the tracker
   tokenId = _tokenIdTracker.current();
   _mint(_recipient, tokenId);
   _tokenIdTracker.increment();


   emit Register(smartContract, _recipient, tokenId);


// Update the fee recipient mapping for the smart contract, associating it with //the tokenId and registration details
   feeRecipient[smartContract] = NftData({
       tokenId: tokenId,
       registered: true,
       balanceUpdatedBlock: block.number
   });
}
This is a function that receives "_recipient" as an input and then mints an NFT to this recipient once your smart contract is registered.
Then, the msg. sender is picked up as the contract to register in the SFS updating the mapping with relevant information.
Here are a few things to note;
The Function is specified
publicmeaning an external smart contract can call it.The
msg.senderis assumed to be a smart contract address, ensuring that a smart contract can register a fee recipient.The Function mints an ownership NFT that allows the owner to claim fees earned by the recipient smart contract.
The Register Function in Practice
Let's take a look at an example to solidify our understanding;
// SPDX-License-Identifier: MIT
pragma solidity ^0.8.0;
import "@thirdweb-dev/contracts/base/ERC20Vote.sol";


contract Register {
   function register(address _recipient) public returns (uint256 tokenId) {}
}


contract Contract is ERC20Vote {
    constructor(
      address _defaultAdmin,
      string memory _name,
      string memory _symbol

  )
      ERC20Vote(
          _defaultAdmin,
          _name,
          _symbol
      )
   {
       Register sfsContract = Register(0xBBd707815a7F7eb6897C7686274AFabd7B579Ff6);
       sfsContract.register(msg.sender);
   }
}
We used a simple ERC20 Vote contract provided with a thirdweb extension which our contract inherits from.
Here are some things to note:
Our code defines two contracts the Register and Contract.
Our contract inherits properties from the ERC20 Vote contract from thirdweb.
We made an instance of the Register contract and called its register function with the sender’s address (
msg.sender) from the constructor.
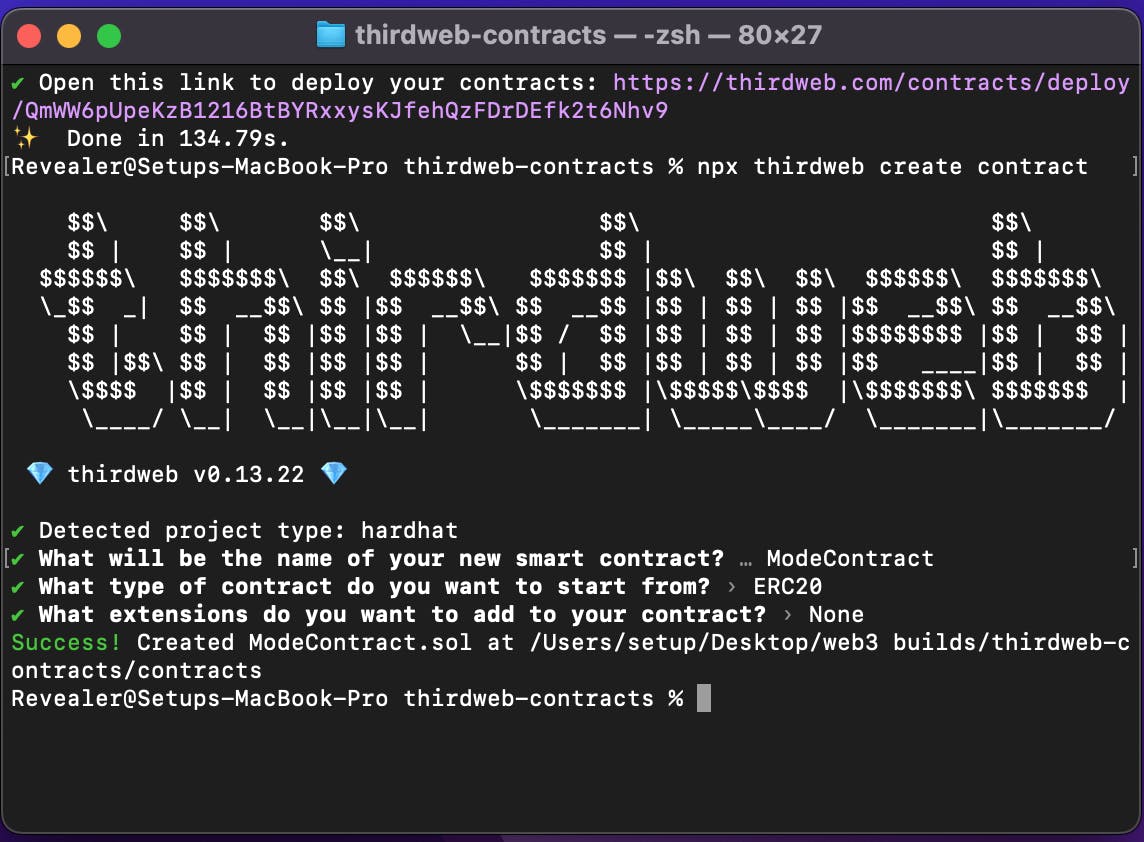
Deploying Our Contract to Thirdweb
We will go through the process of installing the CLI, but If you encounter any issues visit the official documentation.
1. Download the ThirdWeb CLI
To install thirdweb globally, open your terminal and run
npm i -g thirdweb
Now try running:
thirdweb --version
If the CLI is installed correctly you will be prompted to go to the installed version
2. Create a Local environment
Create a new project by running
npx thirdweb create contract
You will be prompted to a menu with different options for setting up your project. For the sake of this tutorial, we will make use of an ERC20 contract.
However, feel free to select an Empty Contract and write your code from scratch.
3. Deploy
Before deploying, thirdweb requires an API key to monitor your smart contracts, check out this tutorial on creating a Thirdweb API Key to get it done.
STEP 1
Navigate to the root of your project and in a terminal run the following:
Yarn deploy or
Npx thirdweb deploy
You will be directed to your thirdweb dashboard.
Before deploying, fill in the parameters for the name and symbol of your token
Select Mode Testnet as the network of your choice.

STEP 2
Click on deploy and sign the transaction from your Metamask to complete it.
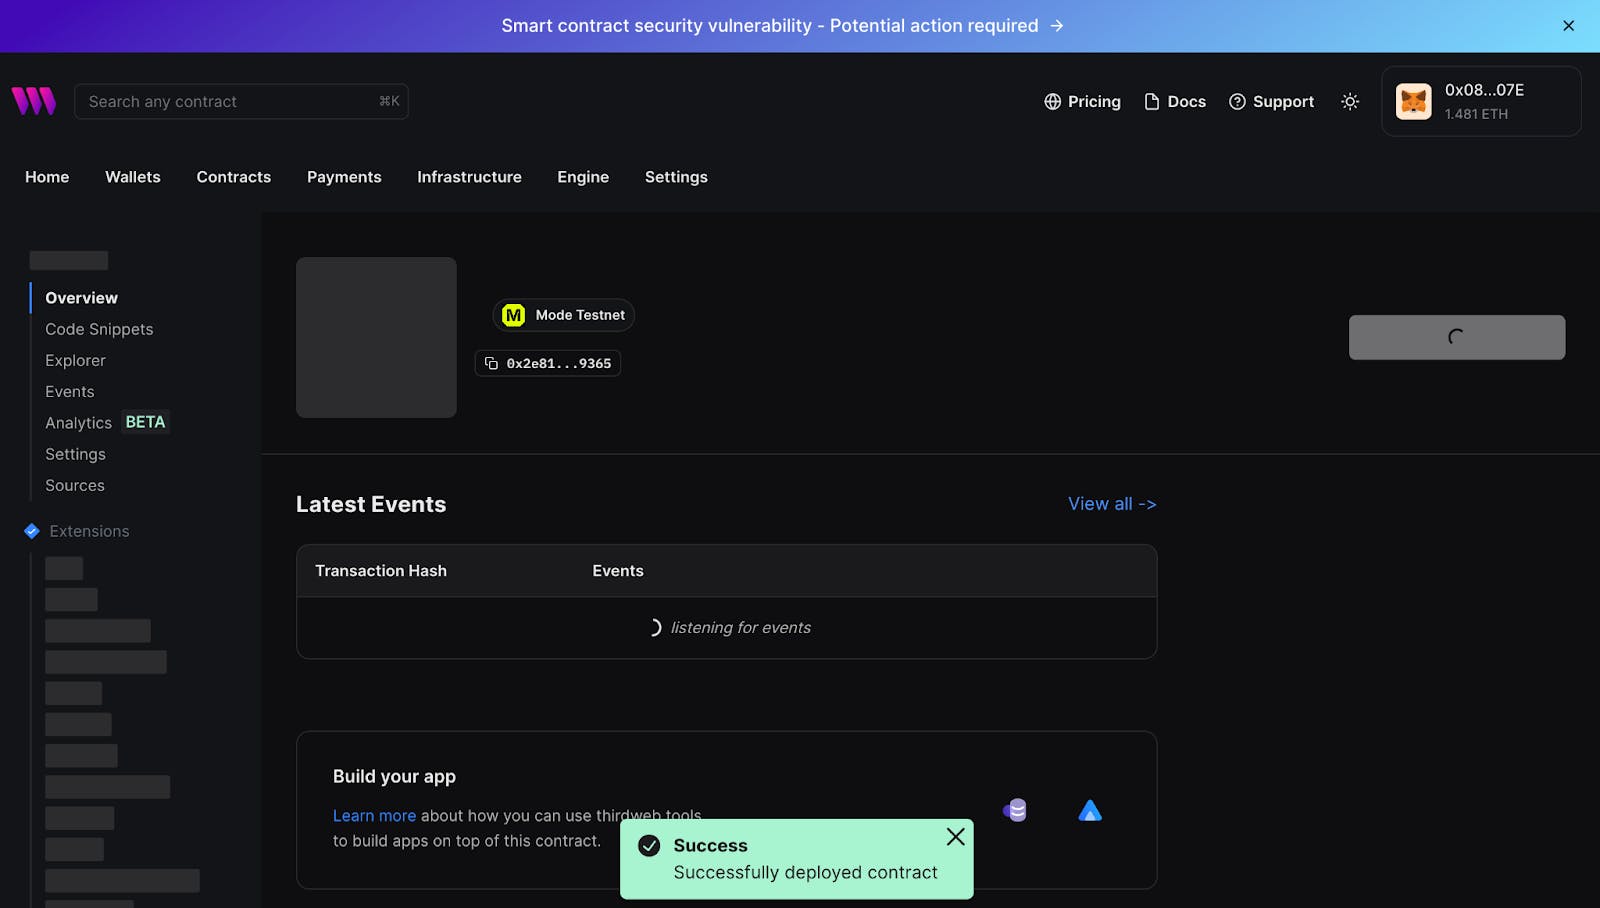
If everything goes well, you should be prompted with this message ”Success”.
Congratulations! You just deployed and registered your contract. From your dashboard, you can read your code, monitor events from your contracts, and many more things.
Our contract should be registered, and the owner address we set as the recipient should have the NFT minted.
To import the NFT to your wallet, check our Adding SFS NFT to Wallet tutorial.